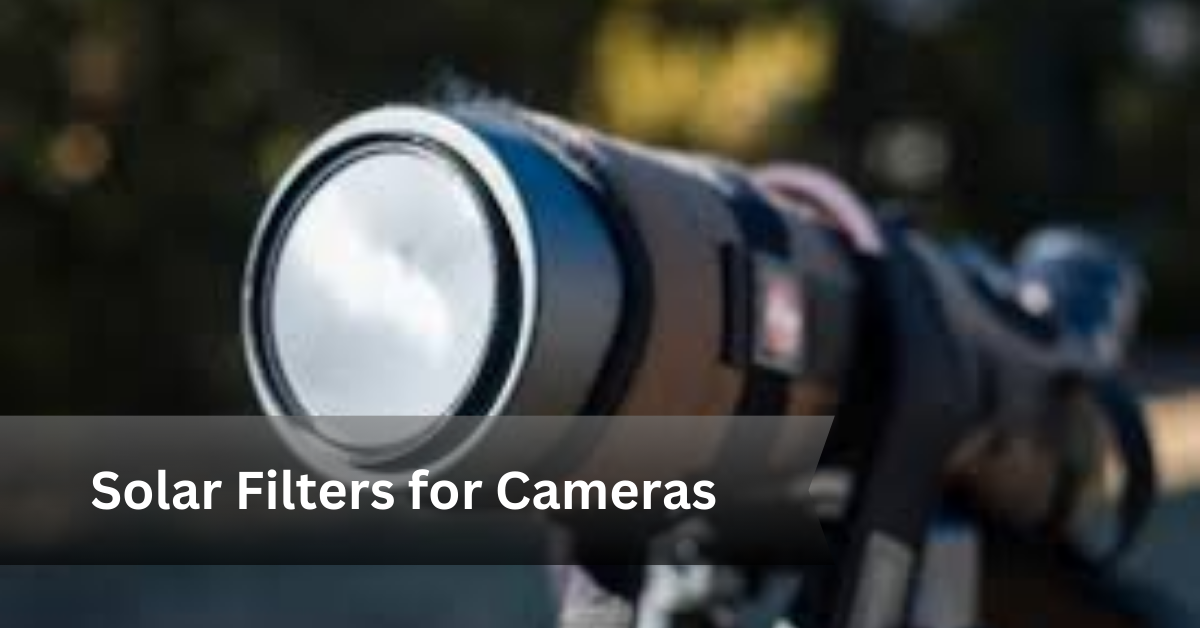
Ever wanted to capture the beauty of the sun or a solar eclipse? Without the right filter, your camera and your eyes could be at risk.
Photographing the sun requires special equipment to prevent damage to both your camera sensor and your vision. A solar filter is essential to safely capture solar events like eclipses, sunspots, and transits without harming your gear.
Using a solar filter is crucial because direct exposure to the sun can permanently damage your camera sensor, while looking at the sun without proper protection can cause serious vision problems. A high-quality solar filter also enhances image clarity by reducing glare and improving contrast, allowing you to capture detailed solar photography.
In this guide, we will explore the different types of camera solar filters and how they work, and help you choose the right filter based on your camera and needs.
Why Do You Need a Solar Filter for Your Camera?
Capturing the sun’s brilliance without the right protection can lead to serious consequences for both your camera and your eyes.
A solar filter is essential for safe solar photography as it reduces the sun’s intense brightness and harmful radiation, ensuring your equipment remains undamaged while producing high-quality images.
Protecting Your Camera Sensor
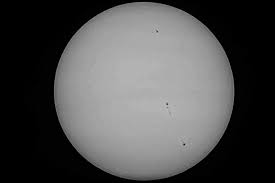
Camera sensors are highly sensitive to light, and direct exposure to the sun can cause permanent damage, including burned pixels or even a completely ruined sensor. A solar filter significantly reduces the intensity of sunlight, allowing safe and detailed photography without harming your equipment.
Eye Safety Concerns
Using a camera without a solar filter, especially when looking through an optical viewfinder, can cause severe eye injuries, including permanent vision damage. Just as staring at the sun with the naked eye is dangerous, viewing it through a camera lens amplifies the risk. A proper solar filter ensures that both your eyes and your camera are protected.
Achieving Perfect Exposure
Without a solar filter, the extreme brightness of the sun overwhelms the camera, making it impossible to capture details like sunspots or eclipses. A solar filter balances light levels, reducing glare and improving contrast, allowing for crisp and well-exposed images of the sun. Whether you are photographing a solar eclipse or capturing sun activity, a high-quality solar filter is a must for stunning and safe results.
Types of Solar Filters for Cameras
Choosing the right solar filter is essential for capturing safe and high-quality images of the sun. Different types of filters offer various levels of protection, durability, and image clarity. Here are the most common types of solar filters used in photography.
Glass Solar Filters – Best for High Durability
Glass solar filters are designed for long-term use and provide superior image quality.
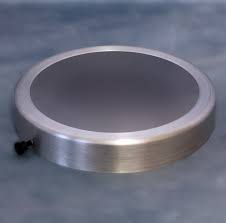
- Pros: Highly durable, scratch-resistant, and produces crisp, high-contrast images.
- Cons: More expensive than other types and less portable due to weight and size.
Glass filters are ideal for professional photographers or those who frequently capture solar events and want a reliable, long-lasting option.
Polymer Solar Filters – Best for Budget Users
Polymer filters are an affordable alternative that still offers good sun protection and image clarity.
- Pros: Budget-friendly, widely available, and easy to use.
- Cons: Image sharpness may not be as high as with glass filters.
These filters are great for beginners or casual photographers who want a cost-effective solution for occasional solar photography.
Baader Solar Film – Best for DIY Enthusiasts
Baader solar film is a lightweight and flexible filter material known for its high optical quality.
Lunt Solar Systems
- Pros: Produces sharp images, affordable, and easy to cut for custom filter sizes.
- Cons: Fragile and requires careful handling and mounting to avoid damage.
This type of filter is popular among DIY photographers who want to create custom solar filters for their lenses or telescopes.
Neutral Density (ND) Filters vs. Solar Filters
Some photographers mistakenly use neutral density (ND) filters instead of proper solar filters. However, ND filters are not designed for direct sun photography.
- Difference: ND filters reduce overall brightness but do not fully block infrared and ultraviolet radiation, which can damage camera sensors and eyes.
- Recommendation: Always use dedicated solar filters instead of ND filters when photographing the sun to ensure complete protection and the best image quality.
K&F Concept
Best Solar Filters for Cameras – Top Picks for Different Needs
Choosing the right solar filter is essential for capturing clear, detailed, and safe images of the sun. Whether you’re using a DSLR, mirrorless camera, telescope, or compact camera, there are specific solar filters designed for your needs. Below are the best options available, each offering unique benefits.
Best for DSLR & Mirrorless Cameras: Baader AstroSolar Film
Baader AstroSolar Film is one of the most recommended options for professional and amateur photographers using DSLR or mirrorless cameras.
- Why? Exceptional optical quality, affordable, and easy to use.
- Features:
- Produces sharp and high-contrast images.
- Provides full protection from harmful UV and infrared radiation.
- Lightweight and easy to cut for custom filter sizes.
- Compatible with most camera lenses when properly mounted.
Best for Telescope Users: Thousand Oaks Optical Solar Filter
Thousand Oaks Optical Solar Filters are a top choice for astronomers and telescope users looking for high durability and precision.
- Why? Durable, high-quality, and fits various telescope sizes.
- Features:
- Made from high-density glass for long-term use.
- Provides a natural orange-yellow sun color for realistic viewing.
- Available in different sizes to fit a wide range of telescopes.
- Designed for secure mounting to prevent accidental exposure.
Best for Compact Cameras: Orion Safety Solar Filter
For users with small cameras, the Orion Safety Solar Filter offers a reliable and easy-to-use solution.
- Why? Specifically designed for compact cameras, highly portable, and safe.
- Features:
- Lightweight and easy to attach to smaller lenses.
- Provides full UV and infrared protection for safe viewing.
- Delivers sharp and clear solar images with minimal distortion.
- Ideal for casual photographers who want a hassle-free filter option.
Best DIY Option: Baader Solar Film DIY Kit
If you’re looking for a cost-effective and customizable solar filter, the Baader Solar Film DIY Kit is an excellent choice.
- Why? Great for customized filter sizes, budget-friendly, and easy to work with.
- Features:
- Allows users to create filters for any camera, telescope, or binocular.
- Maintains high optical quality comparable to professional filters.
- Lightweight and can be cut to any shape or size.
- An economical solution for multiple devices with different lens diameters.
Selecting the best solar filter depends on your photography setup and how often you plan to capture solar events. No matter which option you choose, always ensure your filter provides full protection against harmful solar radiation to safeguard your equipment and eyes.
How to Use a Camera Solar Filter for Photography
Capturing the sun requires careful preparation and the right techniques to ensure both safety and image quality. A solar filter is essential for protecting your camera sensor and achieving well-exposed images. Below are the key steps to using a solar filter effectively for solar photography.
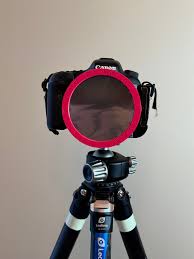
Attaching a Solar Filter to Your Camera
Proper attachment is crucial to avoid light leaks that can affect image quality or damage your camera sensor. Ensure the filter is securely fitted over the lens or telescope and double-check that it stays in place throughout your photography session. For DIY filters, use tape or a filter holder to prevent movement.
Best Camera Settings for Solar Photography
To capture detailed images of the sun, you need the right exposure settings:
- ISO: Keep it low (100-200) to reduce noise and maintain image clarity.
- Shutter Speed: Use a fast shutter speed (1/1000s to 1/4000s) to capture solar eclipses without overexposure.
- Aperture: Set between f/8 and f/16 for sharpness and depth of field.
- White Balance: Use daylight mode for natural sun colors.
Experiment with settings before the main event to find the best balance for your specific camera and filter.
Focusing Techniques for Sharp Solar Images
Achieving sharp focus is essential when photographing the sun. Since autofocus may struggle with bright light, switch to manual focus and fine-tune clarity by zooming in on the live view display. If your camera allows, use focus peaking or a magnified live view to achieve precise sharpness.
Common Mistakes & How to Avoid Them
Many beginners make simple errors that can lead to poor-quality images or even equipment damage:
- Using the wrong filter type → Neutral Density (ND) filters are not a substitute for solar filters and may fail to block harmful infrared and ultraviolet rays, leading to sensor damage.
- Not testing settings beforehand → Blurry, overexposed, or underexposed images can ruin your shots. Always take test photos and adjust settings before the main event.
- Forgetting to remove the filter after the sun sets → Keeping the filter on in low light will prevent you from capturing clear post-eclipse images.
By following these steps and practicing in advance, you can capture stunning, high-quality solar images while keeping your camera and eyes safe.
DIY Solar Photography Filters: How to Make Your Own at Home
Observing the Sun safely requires the right equipment, and a solar filter is essential to protect your eyes and optics from harmful solar radiation. While commercial filters are available, making your own DIY solar filter using Baader solar film is an affordable and effective alternative. In this guide, we’ll walk you through the process of creating your own solar filter step by step.
Materials Needed
To make a DIY solar filter, you’ll need the following materials:
- Baader solar film (AstroSolar Safety Film)
- Cardboard (sturdy enough to hold its shape)
- Tape (electrical or masking tape)
- Scissors or a craft knife
Step-by-Step Guide
Step 1: Measure Your Telescope or Binoculars
- Determine the diameter of your telescope or binoculars’ front aperture.
- Cut a cardboard ring that is slightly larger than this diameter to fit securely.
Step 2: Cut Out the Solar Film
- Place the Baader solar film on a flat, clean surface.
- Cut a piece that is slightly larger than the aperture opening to ensure full coverage.
- Handle the film carefully to avoid scratches or creases.
Step 3: Assemble the Filter
- Tape the solar film securely between two cardboard rings to create a protective frame.
- Ensure the film remains flat and free of wrinkles.
- Attach additional cardboard layers to reinforce the filter’s structure.
Step 4: Attach the Filter to Your Optics
- Secure the filter over the front aperture using tape or a snug-fitting cardboard sleeve.
- Ensure it fits tightly so it doesn’t fall off during use.
Safety Precautions
- Never look at the Sun without a certified solar filter. Even a brief glimpse can cause severe eye damage.
- Check for damage before each use. If the film is scratched or torn, discard and replace it.
- Ensure a secure fit so the filter doesn’t shift or fall off unexpectedly.
By following these steps and safety precautions, you can safely enjoy solar observations with a homemade Baader solar filter. Happy stargazing!
Comparison: Commercial vs. DIY Solar Filters
When choosing a solar filter for safe Sun observation, you have two main options: commercial filters or DIY filters. Both have their pros and cons, depending on your budget, convenience, and desired image quality. Below is a comparison of key features.
| Feature | Commercial Filters | DIY Solar Filters |
| Cost | Expensive ($$$) | Affordable ($) |
| Ease of Use | Pre-made, fits easily | Requires assembly |
| Durability | Long-lasting, sturdy | Fragile, may need replacing |
| Image Quality | Professional-grade views | Quality can vary depending on assembly |
Which One Should You Choose?
- Go for a commercial filter if you prioritize durability, ease of use, and professional-grade image quality.
- Opt for a DIY filter if you’re on a budget and enjoy hands-on projects, but be mindful of proper construction and safety precautions.
Regardless of your choice, always ensure your solar filter is securely attached and free from damage before using it to observe the Sun.
Camera Lens Solar Photography Filters – Essential Guide
Best Solar Filters for Photography
Using the right solar filter is crucial for capturing stunning images of the Sun while protecting your camera sensor from damage. Whether you’re shooting with a DSLR, mirrorless, or telescope-mounted camera, selecting the appropriate solar filter ensures safe and high-quality results.
Guide to Lens Filters for Solar Photography
When choosing a solar filter for your camera lens, consider the following:
- Baader Solar Film – Popular for DIY filters, offering high-quality imaging.
- Glass Solar Filters – Durable and professional-grade but more expensive.
- Threaded Solar Filters – Convenient for DSLR and mirrorless lenses.
Solar Filters for Camera Lenses & Scopes
Different optics require different solar filters:
- Camera Lenses – Use threaded solar filters or attach a DIY Baader film filter.
- Telescopes – Dedicated solar filters or Herschel wedges (for refractors).
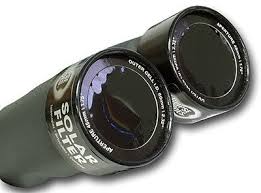
- Binoculars – Solar film filters over both lenses for safe viewing.
All About Solar Filters for Photography
- Neutral Density (ND) Filters vs. Solar Filters – ND filters alone are NOT safe for direct solar viewing.
- H-alpha Filters – Specialized filters for capturing solar prominences and flares.
- White Light Solar Filters – Provide high-contrast sunspot details.
Solar Filter: Yes or No?
Yes! A solar filter is essential for safe solar photography. Without one, you risk damaging both your camera sensor and your eyes. Always verify your filter for any scratches or damage before use.
Real-World Applications & Case Studies
Solar filters are essential tools for capturing detailed images of the Sun safely. From amateur astrophotographers to space agencies like NASA, these filters enable breathtaking solar photography while protecting equipment and vision. Below are real-world applications and case studies showcasing their importance.
Photographing a Solar Eclipse with Solar Filters
A solar eclipse is a rare and mesmerizing event, but capturing it requires precise equipment and techniques.
- Choosing the Right Filter – A white light solar filter (such as Baader film) is commonly used to safely photograph the Sun’s disk.
- Timing Matters – Use a solar filter before and after totality; remove it only during the brief total eclipse phase when the Sun is fully covered.
- Camera Settings – Use a low ISO (100-400), a fast shutter speed, and bracket your exposures to capture different eclipse phases.
Astrophotography Tips from Experts
Professional astrophotographers emphasize the importance of preparation and technique when photographing the Sun.
- Use a Sturdy Tripod – Reduces motion blur and allows for precise tracking.
- Manual Focus – Autofocus may struggle with bright solar images, so fine-tune manually for sharp details.
- Stacking Images – Capture multiple shots and stack them in software like RegiStax or AutoStakkert! for enhanced clarity.
- Safety First – Always inspect filters for scratches or pinholes before use.
NASA’s Use of Solar Filters for Sun Imaging
NASA relies on advanced solar filters to study the Sun’s activity, from sunspots to solar flares.
- Solar and Heliospheric Observatory (SOHO) – Uses specialized filters to observe solar storms and coronal mass ejections.
- Parker Solar Probe – Equipped with cutting-edge filtering technology to capture unprecedented details of the Sun’s outer layers.
- H-alpha and Ultraviolet Imaging – NASA uses different filters to capture various wavelengths of light, revealing solar dynamics invisible to the naked eye.
From amateur eclipse photography to professional solar research, solar filters are essential tools for safe and high-quality Sun observation. Whether you’re a hobbyist or a scientist, the right filter makes all the difference.
Buying Guide: Best Places to Buy Solar Filters
When purchasing a solar filter, it’s important to choose a trusted retailer that offers high-quality, certified filters. Below are some of the best places to buy solar filters for cameras, telescopes, and binoculars.
1. Kentfaith
- Offers ND (Neutral Density) filters for solar photography.
- Ideal for those looking for budget-friendly ND filters.
- Store rating: ⭐ 4.5 (47 reviews).
2. Spectrum Telescope
- Specializes in solar filters for telescopes and cameras.
- Provides a natural yellow-orange image for a realistic solar view.
3. Celestron
- Well-known for high-quality astronomy gear.
- EclipSmart Universal Solar Filter fits optics 75–100mm in diameter.
4. DayStar Filters
- Universal solar filters that fold up for easy storage.
- Works with both camera lenses and telescopes.
5. OPT Telescopes
- Wide selection of Mylar and film solar filters.
- Popular choices: Spectrum Full Aperture Solar Filters.
- Store rating: ⭐ 4.7 (158 reviews).
6. Hunt’s Photo
- Offers the Hoya PRO ND100000, designed for solar photography.
- Great option for those looking for ND filters for Sun imaging.
7. Mile High Astronomy
- Provides expert advice and safety information on solar filters.
- Specializes in filters for telescopes and binoculars.
8. Prism Lens FX
- Features a variety of special effects filters for photography.
- Solar Flare FX Filter is available for creative solar imaging.
What to Consider When Buying a Solar Filter
- Certification: Ensure the filter meets ISO 12312-2 safety standards for solar viewing.
- Compatibility: Check that the filter fits your camera lens, telescope, or binoculars.
- Material: Glass, Mylar, and Baader solar film are the most common options.
- Intended Use: Choose a filter based on whether you’re doing solar viewing or photography.
Final Tip: Order your solar filter in advance, especially before major solar events like eclipses, as they tend to sell out quickly!
Quesries About Solar Filters
Filters for Sun Photography
- Specialized solar filters block harmful UV and IR rays, allowing safe and detailed images of the sun.
- Always use certified solar filters to prevent sensor and eye damage during direct sun capture.
Lenses/Solar Filters for DSLR Solar Eclipse Photography
- Attach a full-aperture solar filter to your DSLR lens to safely capture eclipse phases.
- Neutral density (ND) filters alone are not safe—use ISO-certified solar filters only.
Solar Filters for Solar Eclipse This Spring
Eclipse-ready filters are essential for photographing the 2024–2025 eclipse seasons safely.
Brands like Thousand Oaks, Baader Planetarium, and Orion offer reliable, eclipse-grade protection.
Threaded Camera Filters
- Thread-on solar filters screw directly onto your lens, offering a secure and easy fit.
- Ensure the filter size matches your lens diameter for proper coverage and safety.
Solar Filters for Telescopes, Camera Lenses & Binoculars
- These filters are made for various optics and should be fitted in front of the aperture.
- Never use solar filters behind the eyepiece—they can crack from concentrated light.
Being Safe Using Solar Filters
- Always inspect your solar filter for scratches or pinholes before use.
- Never view or photograph the sun without certified solar protection—serious eye damage can occur.
Solar Filter: Yes or No?
Yes—if you plan to shoot the sun or eclipse, a solar filter is absolutely necessary.
Without it, your camera and eyes are at extreme risk—even brief exposure is dangerous.
Frequently Asked Questions About Solar Filters
Can I Use a Solar Filter for My Phone Camera?
Yes! You can use a solar filter for your phone camera to safely capture the Sun. The best option is a Baader solar film cut and attached to a phone lens adapter. Some companies also make clip-on solar filters specifically for smartphones. Never point your phone at the Sun without a proper filter, as it can damage both the lens and the sensor.
What Are the Best Solar Filters for Cameras?
The best solar filters for cameras depend on your needs:
- Baader AstroSolar Film – Affordable and high-quality for DIY filters.
- Thousand Oaks Optical Glass Filters – Durable and professional-grade.
- Orion Full Aperture Solar Filters – Designed for telescopes and cameras.
- Hoya PRO ND 100000 – A strong neutral density filter for solar photography (not for direct viewing).
Where Can I Find Solar Filters for Cameras Nearby?
You can check local camera stores, telescope shops, or astronomy specialty stores. If you need one urgently, search for “solar filters near me” on Google Maps or visit major retailers like Best Buy, B&H Photo, or local astronomy clubs.
What Is the Best Solar Filter for a Telescope?
For telescopes, the top solar filters include:
- Baader AstroSolar Safety Film – Ideal for DIY solar filters.
- Glass Solar Filters – More durable but pricier.
- Herschel Wedge – For high-end refractor telescopes (not for beginners).
Always choose a filter that fully covers the telescope aperture and is securely attached to avoid accidents.
Are There Nikon Solar Filters for Cameras?
There aren’t Nikon-branded solar filters, but many third-party options work with Nikon cameras:
- Baader AstroSolar Film (DIY option)
- Thousand Oaks Optical Filters (pre-made filters for various lenses)
- Hoya ND 100000 (for photography, not direct viewing)
Ensure you get a properly rated solar filter, not just an ND filter, if your goal is direct Sun photography.
Where Can I Buy Solar Filters for Cameras on Amazon?
Amazon has a wide range of solar filters, including:
- Baader AstroSolar Film – Cut it to fit your lens.
- Thousand Oaks Optical Solar Filters – Available for different lens sizes.
- JJC Solar Filters – Threaded filters for DSLR and mirrorless cameras.
Always check for customer reviews and ensure the filter is certified for safe solar viewing.
What Is a Solar ND Filter?
A Solar ND filter is a high-density neutral density (ND) filter designed for solar photography. Examples include the Hoya ND 100000, which reduces light transmission significantly. However, regular ND filters are not safe for direct solar viewing unless specifically designed for solar imaging.
What Is a Baader Solar Filter?
A Baader Solar Filter refers to Baader AstroSolar Safety Film, a high-quality solar filter material used in professional and DIY solar filters. It provides excellent image quality while maintaining safety for both photography and visual observation. You can buy pre-made Baader filters or create your own by securing the film onto a sturdy frame.
What Is the Best Solar Filter for a Camera?
The best solar filters for cameras depend on your budget and photography needs:
- Baader AstroSolar Film – Affordable, high-quality film for DIY filters.
- Thousand Oaks Optical Glass Filters – Durable, professional-grade filters.
- Hoya PRO ND100000 – A strong neutral density filter suitable for solar photography (not safe for direct viewing).
What Solar Filters Are Best for the Solar Eclipse This Spring?
For the 2024 solar eclipse, make sure to use a proper solar filter rated for safe Sun viewing:
- Threaded Solar Filters – Designed for DSLR/mirrorless lenses.
- Full-Aperture Solar Filters – Cover the entire front of telescopes and cameras.
- Solar Eclipse Glasses – Needed for direct visual observation when not using a camera.
Do I Need a Solar Filter for My Camera?
Yes! Without a proper solar filter, the intense sunlight can damage your camera sensor permanently. Never attempt to photograph the Sun without a certified filter.
What Filter Is Best for Photographing the Sun?
- Baader AstroSolar Film for a neutral-white Sun image.
- H-alpha Filters for capturing prominences and solar flares.
- Glass Solar Filters for long-term use and better durability.
Is a Solar Filter the Same as an ND Filter?
No! A standard ND filter is NOT safe for solar viewing unless it is an ND 100000 or specifically designed for solar photography. A true solar filter blocks infrared and ultraviolet light, protecting both your sensor and eyes.
Do Solar Panels for Cameras Work?
Yes! Solar-powered security cameras work well as long as they receive sufficient sunlight. Many models include a built-in battery that stores energy for use at night or on cloudy days.
Where Should Solar Panels Be Placed for Security Cameras?
- South-facing locations (in the Northern Hemisphere) for maximum sunlight exposure.
- Tilted at an optimal angle based on your location’s latitude.
- Avoid shaded areas (trees, buildings, etc.).
How Long Does It Take for a Solar Panel to Charge a Security Camera?
Charging time depends on sunlight exposure and battery capacity, but typically:
- 4–10 hours of direct sunlight for a full charge.
- Cloudy conditions may extend charging time.
Where Not to Put Solar Panels?
- Shaded areas – Trees, walls, or structures blocking sunlight.
- Flat surfaces with no tilt – Can reduce energy efficiency.
- Low or insecure areas – Risk of theft or damage.
Do Solar Security Cameras Need WiFi?
Not always! Some solar security cameras operate with:
- WiFi (for cloud storage and remote access).
- Cellular LTE/4G connections (for remote locations).
- Local SD card storage (for offline use).
Where Is the Best Place to Put a Home Security Camera?
- Front door & back door – Covers main entry points.
- Driveway & garage – Monitors vehicles and property.
- Side gates & backyard – Prevents unauthorized access.
Where Not to Install Security Cameras?
- Inside bedrooms & bathrooms – Privacy concerns.
- Facing public streets – May violate privacy laws in some areas.
- Too low or within reach – Risk of tampering or theft.
What Is the Number One Home Security Camera?
Top-rated home security cameras include:
- Arlo Pro 4 – Wireless, 2K video, night vision.
- Ring Spotlight Cam – Motion-activated lights, cloud storage.
- Google Nest Cam – Smart AI detection, high-quality video.
- EufyCam 3 – 4K resolution, solar-powered option available.
How Many Security Cameras Should a House Have?
The ideal number depends on your home size, but a typical setup includes:
- 1–2 cameras at entry points (front/back door).
- 1 camera for driveway/garage.
- 1–2 cameras for side yards or backyard.
Conclusion – Get the Best Solar Filter for Stunning Sun Photography
Capturing the Sun in all its glory requires the right equipment, and a high-quality solar filter is essential to protect both your camera and your eyes. Whether you’re photographing a solar eclipse, sunspots, or the Sun’s surface details, choosing the right filter ensures safe and stunning results.
Key Points:
- Safety First – Always use a certified solar filter to prevent damage to your camera sensor and eyesight.
- Choose Wisely – Consider budget, durability, and image quality when selecting between commercial and DIY filters.
- Plan Ahead – For solar events like eclipses, preparation is key. Test your setup and settings in advance for the best results.
Don’t miss your chance to capture the next solar eclipse! Get a reliable solar filter today!