
Why Smart Home Security Is Essential Today
Home security has never been more important. With increasing concerns over package theft, break-ins, and property surveillance, smart security cameras have become a necessity rather than a luxury.
Gone are the days when home security required expensive professional installations. Today, WiFi security cameras offer an affordable, DIY alternative, allowing homeowners to monitor their spaces from anywhere using a smartphone.
Geeni Cameras offer a powerful yet affordable security solution, making them ideal for homeowners, renters, and small businesses looking for easy, reliable, and cost-effective home monitoring.
This Article covers everything about the geeni camera you have to know.
What is a Geeni Camera?
Geeni is a leading brand in the smart home industry, offering a range of affordable, user-friendly devices, including smart bulbs, plugs, and cameras. Their cameras provide HD video streaming, motion detection, night vision, and two-way audio—all accessible through the Geeni mobile app.

Key Features of Geeni Camera
Geeni Cameras are designed to provide budget-friendly yet high-quality home security. With easy setup, smart home integration, and cloud or local storage options, they are ideal for users seeking a simple, effective way to enhance security. Here are some key feature:
1. HD Video Quality – 1080p Live Streaming
- Enjoy crisp, clear video resolution for real-time monitoring.
- Provides detailed footage even in low-light conditions.
2. Night Vision & Motion Detection – Enhancing Security
- Infrared night vision ensures visibility in complete darkness.
- Motion detection alerts notify users instantly via the Geeni app.
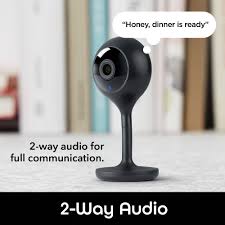
3. Two-Way Audio – Talk and Listen Remotely
- Built-in microphone and speaker allow real-time communication.
- Perfect for checking on pets, family members, or deterring intruders.
4. Cloud & Local Storage – Subscription vs. SD Card Options
- Flexible storage options:
- Cloud storage (requires a subscription).
- MicroSD card storage (no subscription required).
- Users can choose between continuous recording or motion-triggered clips.
5. Smart Home Compatibility – Works with Alexa & Google Assistant
- Voice control capabilities allow hands-free operation.
- Easily integrate with other smart home devices for enhanced automation.
How to Set Up a Geeni Camera (Step-by-Step Guide)
Setting up a Geeni Camera is quick and straightforward, making it an excellent choice for beginners and smart home enthusiasts. Whether you’re installing it for home security, pet monitoring, or general surveillance, following these steps will ensure a smooth setup process.
1. Unboxing & Components – What’s in the Box?
When you purchase a Geeni Camera, you can expect the following components inside the box:
- The Geeni Camera unit
- A power adapter and USB cable
- A mounting bracket (if applicable)
- Screws and anchors for wall mounting
- A quick start guide
Before proceeding, check that all components are included and undamaged.
2. Connecting to WiFi – Troubleshooting Common Issues
To ensure seamless video streaming and remote access, your Geeni Camera must be connected to a stable 2.4 GHz WiFi network (Geeni cameras do not support 5 GHz networks).
Steps to connect:
- Place the camera near your router during setup for a strong signal.
- Power on the camera and wait for the indicator light to blink (this signals it’s in pairing mode).
- Ensure your smartphone is connected to the same 2.4 GHz WiFi network.
- Check for any network interference, such as multiple devices overloading the bandwidth.
- If connection fails, restart your router and try again.
3. Geeni App Installation & Setup – Step-by-Step Guide
- Download the Geeni App from the Apple App Store or Google Play Store.
- Create or log in to your Geeni account.
- Tap the “+” icon to add a new device.
- Select “WiFi Camera” from the list of devices.
- Follow the on-screen instructions to scan the QR code displayed in the app using the camera.
- Once the camera is detected, connect it to your WiFi network.
- Assign a custom name (e.g., “Front Door Camera”) for easy identification.
4. Configuring Motion Alerts & Notifications – Best Settings for Security
After setup, adjusting the camera’s motion detection settings ensures you receive the right alerts.
Steps to optimize motion alerts:
- Open the Geeni App and select your camera.
- Navigate to “Motion Detection Settings”.
- Adjust motion sensitivity to low, medium, or high depending on your needs.
- Enable push notifications to receive real-time alerts.
- Set up activity zones (if available) to monitor specific areas.
For outdoor use, reducing sensitivity can prevent false alarms from passing cars or tree movement.
5. Storage & Recording Options – Free vs. Paid Cloud Storage Plans
Geeni offers two storage options:
- Local Storage: Insert a microSD card (up to 128GB) for continuous or motion-triggered recording.
- Cloud Storage: A paid subscription plan that stores recordings securely online with remote access.
Comparison:
- Local storage is a one-time purchase, but videos are stored only on the device.
- Cloud storage allows remote access to past recordings, even if the camera is damaged or stolen.
Geeni Camera vs. Competitors: How Does It Compare?
When selecting a smart home camera, it’s essential to compare features, pricing, and functionality against competitors.
| Feature | Geeni Camera | Ring Camera | Arlo Camera | Wyze Camera |
| Price | Affordable | Expensive | Expensive | Budget-friendly |
| Resolution | 1080p HD | 1080p HD / 4K | 1080p HD / 4K | 1080p HD |
| Smart Home Integration | Alexa & Google Assistant | Alexa only | Alexa & Google Assistant | Alexa & Google Assistant |
| Storage Options | Cloud & SD Card | Cloud only | Cloud & SD Card | Cloud & SD Card |
| Motion Detection | Standard | Advanced AI | Advanced AI | Standard |
| Night Vision | Yes | Yes | Yes | Yes |
Geeni Cameras stand out as a cost-effective, feature-rich option for those who need reliable home security without expensive subscriptions. While brands like Ring and Arlo offer premium features, Geeni provides affordable smart security with flexible storage options.
By following this guide, you can quickly set up your Geeni Camera and start monitoring your space with confidence.
How People Use Geeni Cameras: Practical Applications & Reviews
Geeni Cameras are versatile and cater to various security and monitoring needs. Whether you’re looking to protect your home, keep an eye on pets, or secure a small business, these smart cameras provide an affordable and effective solution. Here’s how users are utilizing Geeni Cameras in real-world scenarios.
Home Security – Preventing Package Theft
- Monitor front doors, driveways, and entry points.
- Get real-time motion alerts when someone approaches.
- Deter potential thieves with two-way audio communication.
Pet Monitoring – Keeping an Eye on Pets Remotely
- Check on pets while at work or traveling.
- Use two-way audio to communicate with your pet.
- Monitor pet activity in specific areas using motion detection.
Baby Monitoring – A Budget-Friendly Baby Monitor Alternative
- Live stream your baby’s room in HD quality.
- Enable night vision for clear visibility in the dark.
- Use two-way audio to soothe your baby remotely.
Small Business Security – An Affordable Surveillance Solution
- Monitor stores, offices, and warehouses without expensive security systems.
- Review recorded footage for security incidents.
- Share camera access with employees for added security.
Troubleshooting & Common Issues with Geeni Camera
Like any smart device, Geeni Cameras may encounter occasional connectivity or performance issues. Below are some of the most common problems users face and how to resolve them.
Geeni Camera Not Connecting to WiFi? – Step-by-Step Fixes
- Ensure the camera is within range of a 2.4 GHz WiFi network (Geeni does not support 5 GHz).
- Restart both the router and camera.
- Check if the Geeni app is updated to the latest version.
- Remove and re-add the camera in the app if the issue persists.
Motion Detection Not Working? – Adjusting Settings for Better Accuracy
- Open the Geeni App and select your camera.
- Navigate to motion detection settings and increase sensitivity.
- Ensure motion detection is enabled in the app.
- Adjust the camera’s position to avoid obstructions.
Video Playback Issues? – Resolving Lag or Black Screen Problems
- Check your WiFi connection speed for streaming issues.
- Restart the app and clear its cache if playback freezes.
- Ensure your cloud storage or SD card is properly set up for recorded footage.
Best Geeni Camera Models for Different Needs
Choosing the right Geeni Camera depends on your specific security needs. Below are the top models based on performance, features, and affordability.
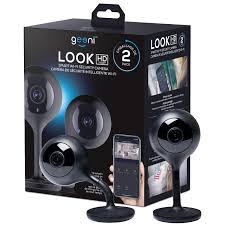
Best Overall: Geeni Look 1080p Smart WiFi Camera
- Ideal for home security and indoor monitoring.
- Features HD video, night vision, and two-way audio.
- Supports both local storage and cloud storage.
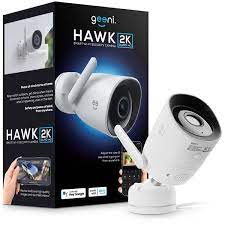
Best for Outdoor Security: Geeni Hawk 3 Outdoor Security Camera
- Designed for weather-resistant outdoor surveillance.
- Equipped with motion alerts and night vision.
- Works with Alexa and Google Assistant.
Best Budget Option: Geeni Vision 720p Indoor Camera
- Affordable choice for basic home security.
- Provides live streaming and motion detection alerts.
- Supports local storage via microSD card.
Best for Pet Monitoring: Geeni Look Indoor Camera with Two-Way Audio
- Perfect for keeping an eye on pets while away.
- Two-way audio allows you to talk to and hear your pet.
- Motion alerts notify you of pet activity at home.
Geeni Cameras offer a balance of affordability, ease of use, and smart home integration, making them a great choice for various security needs.
People Also Ask: FAQs About Geeni Cameras
How do I connect my Geeni camera?
To connect your Geeni camera:
- Download the Geeni app on your smartphone.
- Plug in the camera and power it on.
- Connect your phone to a 2.4 GHz WiFi network.
- Open the app, tap “+” to add a device, and follow the setup instructions.
Is there a monthly fee for a Geeni camera?
Geeni offers both free and paid cloud storage options. Local storage via a microSD card is free, but cloud recording requires a monthly subscription for extended storage.
How do I change the Wi-Fi network on my Geeni camera?
To switch networks:
- Reset the camera by holding the reset button for 5-10 seconds.
- Open the Geeni app and remove the device.
- Reconnect the camera by following the initial WiFi setup process.
Does Geeni work without Wi-Fi?
Geeni cameras require Wi-Fi for remote access and cloud recording. However, if using a microSD card, the camera can record locally without internet access.
Why is my Geeni camera not connecting?
Common fixes include:
- Ensuring your Wi-Fi is 2.4 GHz, as Geeni does not support 5 GHz.
- Restarting your router and camera.
- Making sure your Geeni app is updated.
How do I connect my smart camera to Wi-Fi?
Follow the setup process in the Geeni app, ensuring your phone is connected to a 2.4 GHz network before adding the camera.
How do I get my Geeni camera back online?
- Restart the camera and Wi-Fi router.
- Check for app updates and ensure your internet connection is stable.
- If needed, reset the camera and reconnect it.
Why is my camera not connecting to Wi-Fi?
Ensure your Wi-Fi is 2.4 GHz, place the camera closer to the router, and restart both the router and camera before attempting to reconnect.
What does the red light mean on a Geeni camera?
A flashing red light indicates the camera is in setup mode, while a solid red light may signal a connection issue.
How do I reconnect my camera to the internet?
Restart your Wi-Fi router and camera, then check the Geeni app for reconnection options. If needed, reset the camera and reconfigure the Wi-Fi settings.
Why isn’t my camera connecting to my phone?
- Ensure your phone is on the same Wi-Fi network as the camera.
- Check for app updates and enable the required permissions.
- Restart the camera and phone, then attempt to reconnect.
How do I know if I have 2.4 GHz Wi-Fi?
- Check your router settings in the admin panel.
- Look for network names like “YourWiFi_2G” or “YourWiFi_5G”.
- If unsure, contact your internet service provider (ISP).
Where is the reset button on Geeni camera?
The reset button is usually on the back or bottom of the camera. Hold it for 5-10 seconds to reset the device.
Does the red light mean the camera is on or off?
A solid red light may indicate a connection issue, while a flashing red light means the camera is in setup mode.
How do I get my Geeni camera to work?
Ensure the camera is plugged in, connected to 2.4 GHz Wi-Fi, and set up using the Geeni app. If issues persist, reset the device and try again.
How do I get my camera back online?
- Restart the router and camera.
- Check the Wi-Fi signal strength.
- If needed, reset the camera and set it up again.
How do I reconnect my device to the Internet?
Open the Geeni app, select your camera, and follow the Wi-Fi setup steps. Restart the router if connection issues continue.
How do I allow my camera to access the Internet?
Ensure your router’s firewall isn’t blocking the connection and check that your camera is correctly linked to your home Wi-Fi network.
How do I restart my camera?
Unplug the camera for 30 seconds, then plug it back in. Alternatively, use the reset button to perform a factory reset.
What should I do if my camera is not working?
- Ensure it’s powered on and the Geeni app is updated.
- Restart your router and camera.
- If the issue persists, reset and reconfigure the camera.
Why is my security camera not working on my phone?
- Check your Wi-Fi connection.
- Ensure the Geeni app has the necessary permissions.
- Restart the app, camera, and phone if needed.
Why is Geeni offline?
- Check your internet connection.
- Restart your router and camera.
- If offline for an extended period, reset and reconnect the camera.
What is the solid blue light on my Geeni camera?
A solid blue light means the camera is connected to Wi-Fi and working properly.
Can someone else connect to my Geeni camera?
Only people with access to your Geeni account can connect. For security, use a strong password and enable two-factor authentication (if available).
Conclusion
Geeni Cameras provide an affordable and user-friendly solution for home security, pet monitoring, baby surveillance, and small business protection. With features like HD video quality, night vision, two-way audio, and smart home compatibility, they offer a reliable way to keep an eye on what matters most.
Whether you need an indoor camera for monitoring pets, an outdoor security camera for preventing package theft, or a budget-friendly baby monitor, Geeni has an option to suit your needs. Plus, with flexible storage choices, including local SD cards and cloud subscriptions, you can store and access your recordings with ease.
By following the setup guide, troubleshooting common issues, and selecting the right model for your needs, you can maximize the performance of your Geeni Camera. Ready to enhance your security with smart surveillance? Explore the latest Geeni Camera models today and take control of your home’s safety.